Soil Moisture Sensor ft. Embedded Systems
This was the final project for my Embedded Systems class. It utilized Capacitive Soil Moisture Sensors connected to a raspberry pi to monitor the soil moisture for indoor plants. With the variable weather and humidity here in the front range of Colorado, caring for fickle house plants can be a challenge at times. Utilizing soil moisture sensors to track data and set reminders when and how much to water certain house plants sounded like a fun challenge that utilized a lot of the topics and technologies we covered in the content of the class.
This set of classes was about embedded linux development. We wrote a lot of C code and learned about tooling used to create embedded systems (ex. Buildroot and Yocto). The final class in this specialization included a final project which allowed us to chose any topic or project that utilized the topics and technologies in the course. I had been wanting to diy a soil moisture sensor for a while so this was the perfect opportunity to. Although made a bit more challenging given the context of the course.
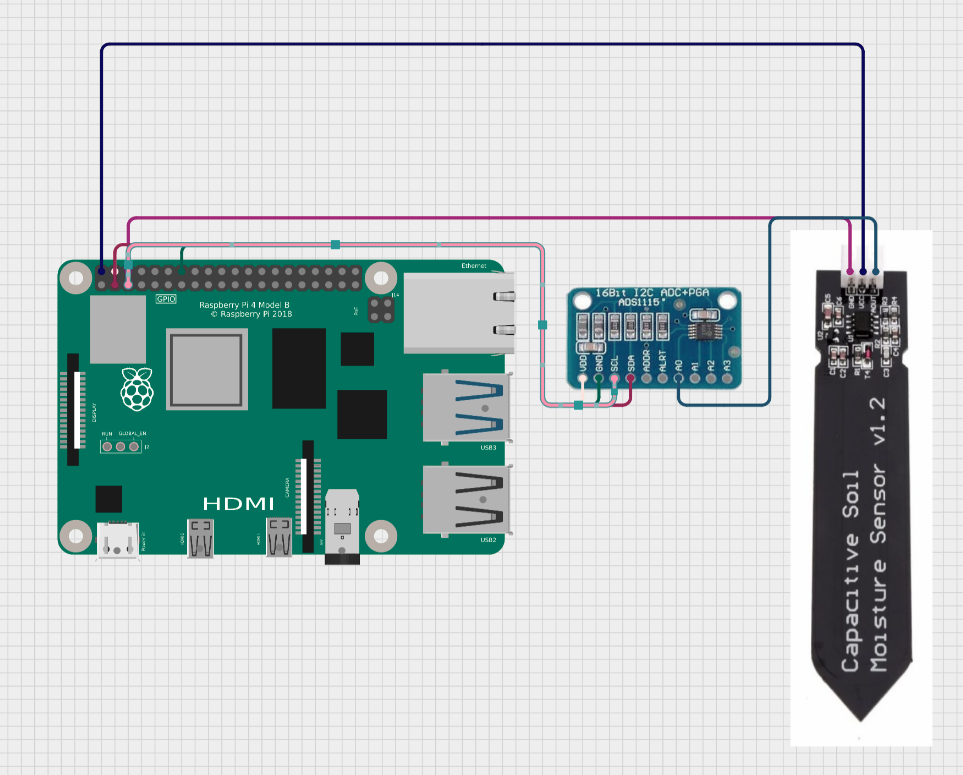
The components required for this project:
- Raspberry pi 4b (or any SBC)
- ADS1115
- Capacitive Soil Moisture Sensor (TL555)
To connect the soil moisture sensor to the Pi, we’ll need the ADS1115 analog-to-digital converter, wired as shown above.
If this weren’t an embedded systems class, I could’ve installed the necessary drivers required onto my pi and written a few lines of python code to output sensor data in an afternoon. But of course we’ll have to do this the hard way. The end goal is to create a root filesystem, a Linux kernel image and a bootloader for our Pi to automatically spin up everything required for our project and sensor. To do this we’ll use a tool called buildroot. Which will help us automate the necessary components for our system. We’ll start out with a base linux system and include everything required to run our sensor and associated programs.
We’ll start out with a base linux system and include everything required to run our sensor and associated programs. I won’t cover all the steps involved but we’ll hit a few of the main ones.
Our repository - (repo link) structure will look something like this:
├── base_external
│   ├── board
│   ├── Config.in
│   ├── configs
│   ├── external.desc
│   ├── external.mk
│   ├── package
│   │   └── soil-moisture-sensor
│   └── rootfs_overlay
├── buildroot
├── build.sh
├── notes.md
├── README.md
├── save-config.sh
└── shared.sh
buildrootis configured as a git submodule containing the buildroot codebase_externalcontains all the additional configuration requiredconfigscontains the config which has basically all the custom requirements for our specific build. It also sets up a few of the additional directories or files needed for our build.package/soil-moisture-sensorsets up our custom programs (noted below)rootfs_overlayanything that’s needed on the root filesystem at startupbuild.shis our build script which runs buildroot and outputs our iso file, which we then flash on our raspberry pi.
Turns out enabling all the required programs and drivers to support i2c devices on a raspberry pi via buildroot is not a common use case. There’s very little documentation online and what is there is only somewhat accurate. Buildroot offers a variety of ways to add custom configurations to your package.
The best way is via the config:
BR2_PACKAGE_I2C_TOOLS=y
Another way is through rootfs overlays:
base_external/rootfs_overlay/etc/init.d/S01i2cmodules

#!/bin/sh
# Load I2C kernel modules early at boot

echo "[S01i2cmodules] Loading I2C modules..."
modprobe i2c-bcm2835
modprobe i2c-dev
Both are valid strategies and depend on the use case. In general the more specific something is less likely you’ll be able to enable it via the config.
Finding out which method worked for my use case was a tedious task of trial and error. Eventually I was able to enable everything I needed via the config, rootfs overlays, and post build scripts.
Next up I wanted to install a few custom programs to make use of my sensors. To do this I setup package/soil-moisture-sensor that points to another git repository that contains code for my custom programs.
SOIL_MOISTURE_SENSOR_VERSION = 54e97305299831c2e53dd2559a5711a20d88050d
SOIL_MOISTURE_SENSOR_SITE = git@github.com:Christian-Bull/soil-moisture-server.git
SOIL_MOISTURE_SENSOR_SITE_METHOD = git
SOIL_MOISTURE_SENSOR_GIT_SUBMODULES = YES

define SOIL_MOISTURE_SENSOR_BUILD_CMDS
	$(MAKE) $(TARGET_CONFIGURE_OPTS) -C $(@D)/sensor-scraper all

	cd $(@D)/server && \
		$(TARGET_MAKE_ENV) \
		GOOS=linux GOARCH=arm64 CGO_ENABLED=0 \
		$(HOST_DIR)/bin/go build \
			-buildvcs=false \
			-trimpath \
			-ldflags "-s -w" \
			-o $(@D)/sensor-server \
			sensor-server.go
endef

define SOIL_MOISTURE_SENSOR_INSTALL_TARGET_CMDS
	cp -r $(@D)/sensor-scraper/* $(TARGET_DIR)/bin/

	$(INSTALL) -D -m 0755 $(@D)/sensor-server $(TARGET_DIR)/usr/bin/sensor-server

	$(INSTALL) -d -m 0755 $(TARGET_DIR)/etc/init.d/
	$(INSTALL) -D -m 0755 $(@D)/server/start-server.sh $(TARGET_DIR)/etc/init.d/S87sensorserver
endef

$(eval $(generic-package))Sensor-scraper- C program that reads the sensor and outputs the current values to a fileSensor-server- Go program that sets up a webserver to handle requests for sensor data
After all the above work I now have a pre-built image that contains everything I need to construct and boot up my pi. Starting fresh, I could assemble the Pi as noted above, install my custom iso, and have my custom programs startup on boot.
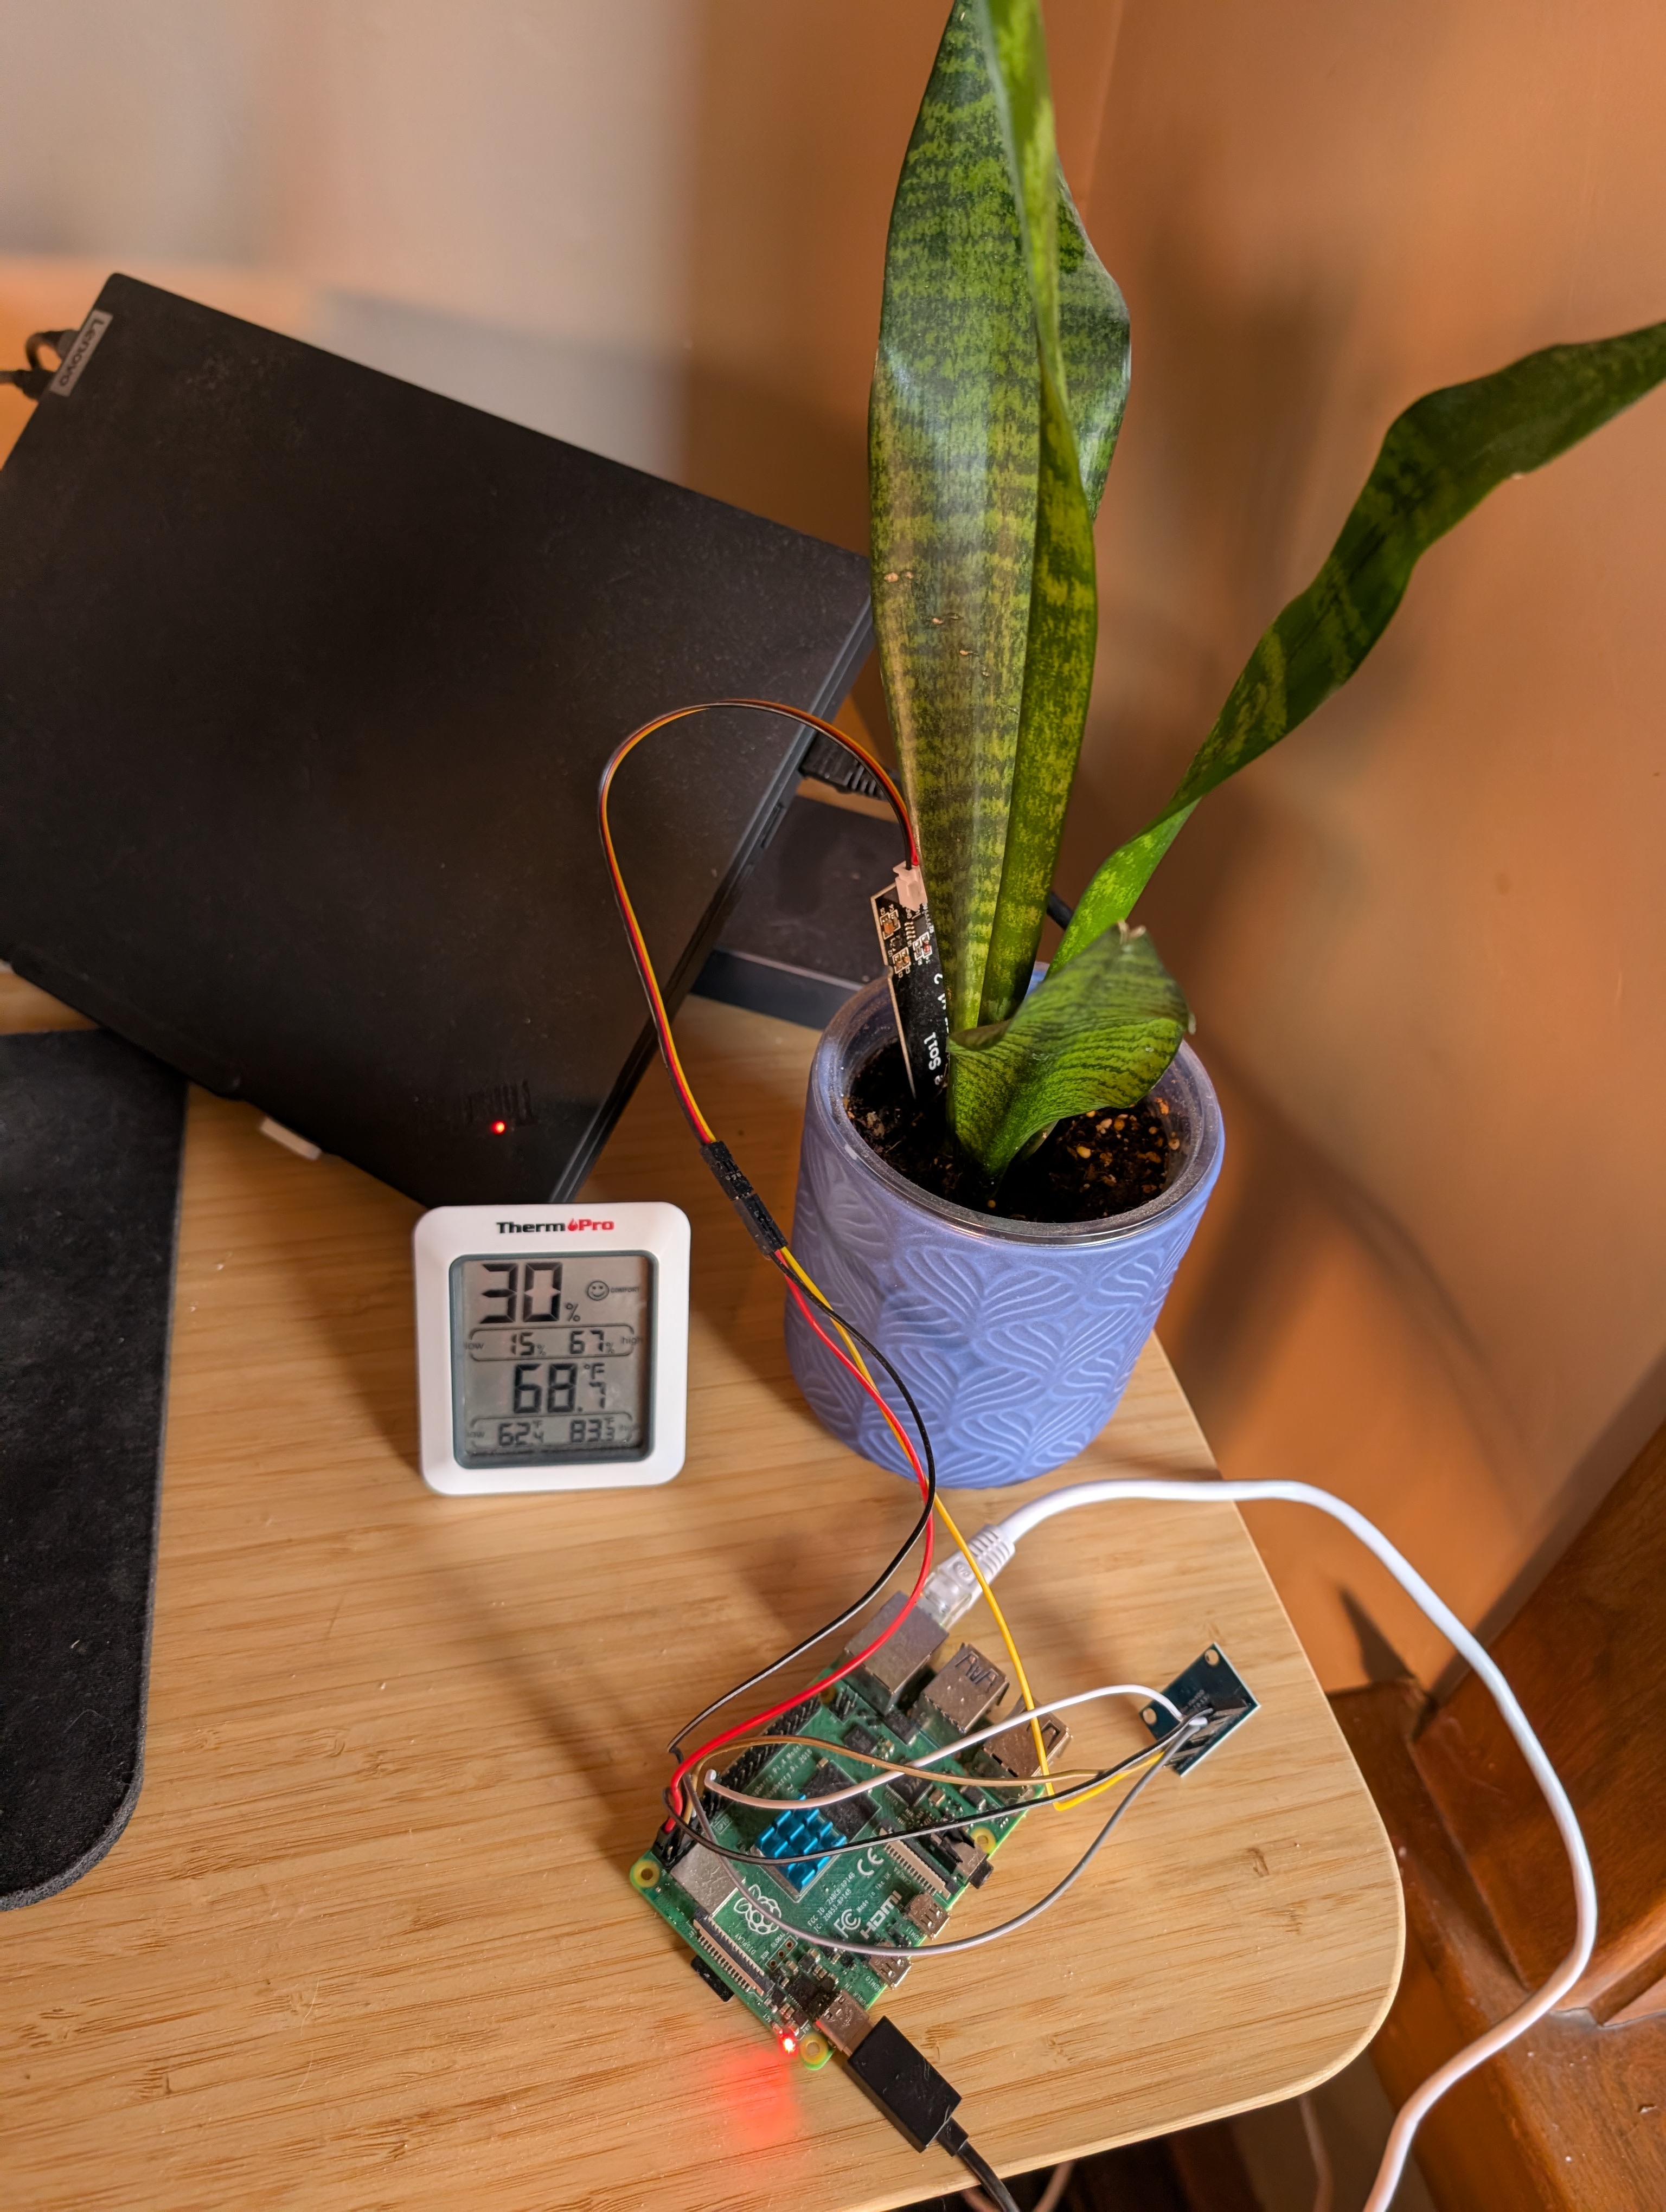
Final result - it’s worth noting tracking the soil moisture for the humble snake plant is a tad overkill. But it’s the plant I had on my desk at the time :)